Preparing the Elixir Development Environment
Learn Elixir
What is the asdf version manager?#
When installing Erlang, we can follow the instructions on the official Erlang/OTP download page ↗. The same goes for Elixir, which we can install by following the guide on its official website ↗. However, this approach has a major limitation: we can only install one version of the runtime on a single machine. Trying to install a different version could cause conflicts or require us to overwrite the existing one.
To work around this, we can use a version manager, a tool that allows us to manage multiple runtime versions on the same machine. This way, each project can use the version that best fits its own requirements.
A version manager is also useful for ensuring everyone on the team is using the same versions, reducing the risk of environment inconsistencies and compatibility issues.
In this post, we’ll be using a version manager called asdf-vm ↗, or simply asdf.
Why Choose asdf?#
asdf is a version manager that lets us manage multiple runtimes using a single tool. With asdf, we can install and configure versions of Erlang, Elixir, Node.js, and many other runtimes through a unified CLI interface. This sets it apart from other version managers that typically support only a single runtime. For example, nvm is specifically designed for managing Node.js versions.
Imagine having to use a different tool for every runtime: one for Erlang, another for Elixir, and yet another for Node.js. Not only is that inefficient, but we’d also have to learn how each of those tools works. With asdf, we only need to learn a single, consistent interface that works across all runtimes.
So, why choose asdf? First, it provides a consistent interface for managing all runtimes. Second, it offers extensive plugin support, including officially maintained (first-party) plugins for Erlang and Elixir.
As of now, asdf offers nearly 100 community-maintained plugins ↗. We can install the runtimes we need based on the requirements of each project. And since the plugins for Erlang and Elixir are first-party, we can rely on their stability and official support.
asdf Installation#
In this post, we will install three main runtimes:
- Erlang - because Elixir runs on top of the BEAM VM.
- Elixir - as the main programming language we will use and learn.
- Node.js (optional) - needed if we want to manage frontend assets in Phoenix Framework ↗.
To install asdf, there are two recommended methods: via a package manager or by downloading the precompiled binary from GitHub. Other methods such as go install or building from source are also available, but we won’t cover them here. If you’re interested in those methods, please refer to the official documentation page ↗.
Using a Package Manager#
This is the method recommended by the asdf developers. Currently, only three package managers are officially supported: Homebrew (macOS), Zypper (openSUSE Linux), and Pacman (Arch Linux):
# For Homebrew (macOS)
$ brew install asdf

# For Zypper (openSUSE Linux)
$ zypper install asdf

# For Pacman (Arch Linux via AUR)
$ git clone https://aur.archlinux.org/asdf-vm.git && cd asdf-vm && makepkg -siThe
sudocommand may be required depending on your system configuration.
If the operating system we use isn’t listed above, the next method can be used as an alternative.
Downloading a Precompiled Binary#
This method requires git. To ensure git is installed, run the following command:
$ git --versionIf a git version is displayed, that means it’s already installed. If not, install it based on your operating system:
# APT (Ubuntu Linux)
$ apt install git

# DNF (Fedora Linux)
$ dnf install git

# Pacman (Arch Linux)
$ pacman -S git

# Zypper (openSUSE Linux)
$ zypper install git

# Homebrew (macOS)
$ brew install coreutils gitThe
sudocommand may be required depending on your system configuration.
Once git is available, open the asdf GitHub release page ↗ and download the .tar.gz archive that matches our system architecture.
Extract the archive into one of the directories listed in the $PATH environment variable. To view the list of directories in $PATH, run:
$ echo $PATH
/home/your_user_name/.local/bin:/usr/local/bin:/usr/bin:/binThe output is a list of directories separated by colons (:). Choose one of these directories as the extraction target:
/home/your_user_name/.local/bin- user-owned directory, suitable for installation without root access./usr/local/bin- commonly used for additional software./usr/binand/bin- should generally be avoided unless absolutely necessary, since they’re part of the core system.
The most recommended directory is /home/your_user_name/.local/bin because it doesn’t require root access and is safer for daily use.
Verifying Binary Location#
After extracting, let’s make sure asdf is recognized by the shell:
$ type -a asdf
asdf is /home/your_user_name/.local/bin/asdfIf the output shows the location of the asdf file, that means it’s recognized successfully. If it doesn’t show up, it’s likely that the extraction directory hasn’t been listed to $PATH.
Verifying asdf Installation#
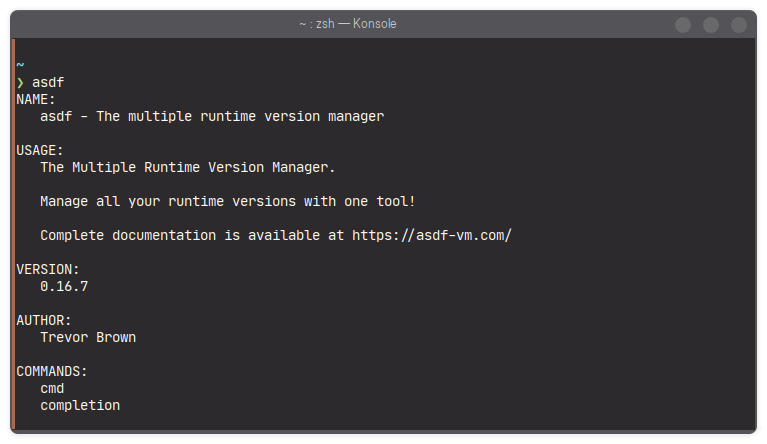
Finally, let’s run the following command to confirm the installation works:
$ asdfIf successful, it will displayed the version and the asdf program name.
Now asdf is ready to use. Next, we’ll install the Erlang, Elixir, and Node.js plugins.
asdf Plugin Installation#
asdf uses plugins to manage different runtimes like Erlang, Elixir, and Node.js. Before we can install a runtime, we need to add the appropriate plugin.
Erlang Plugin#
The first step is to add the Erlang plugin, followed by Elixir.
Before adding the Erlang plugin, we’ll need to install some required system packages. The list below depends on which operating system we’re using:
# APT (Ubuntu Linux 24.04)
$ apt install build-essential autoconf m4 libwxgtk3.2-dev libwxgtk-webview3.2-dev libgl1-mesa-dev libglu1-mesa-dev libpng-dev libssh-dev unixodbc-dev xsltproc fop libxml2-utils libncurses-dev unzip

# DNF (Fedora Linux)
$ dnf install gcc g++ automake autoconf ncurses-devel wxGTK-devel wxBase openssl-devel libxslt fop unzip

# Pacman (Arch Linux)
$ pacman -S --needed base-devel ncurses glu mesa wxwidgets-gtk3 libpng libssh unixodbc libxslt fop unzip

# Zypper (openSUSE Linux)
$ zypper install make automake autoconf gcc-c++ ncurses-devel libssh-devel libopenssl-devel wxGTK3-3_2-devel fop libxml2-tools libxslt-tools unzip

# Homebrew (macOS)
$ brew install autoconf openssl@3 wxwidgets libxslt fop unzipThe
sudocommand may be required depending on your system configuration.
Once all dependencies are installed, let’s add the Erlang plugin using this command:
$ asdf plugin add erlangCheck if the plugin was added successfully:
$ asdf plugin list
erlangIf the output shows erlang, that means the plugin is now active.
Elixir Plugin#
After Erlang, let’s continue by adding the Elixir plugin:
$ asdf plugin add elixirVerify it again:
$ asdf plugin list
elixir
erlangNow both elixir and erlang plugins are listed in asdf.
Node.js Plugin (Optional)#
The Node.js plugin is optional, but it’s commonly used in Elixir application development, especially when working with the Phoenix Framework ↗, which involves managing frontend assets.
Just like Erlang, this plugin also requires some additional system packages:
# APT (Ubuntu/Debian)
$ apt install dirmngr gnupg curl gawk

# DNF (Fedora/CentOS/RHEL)
$ dnf install dirmngr gnupg2 curl gawk

# Pacman (Arch Linux)
$ pacman -S dirmngr gnupg curl gawk

# Zypper (openSUSE)
$ zypper install dirmngr gpg2 curl gawk

# Homebrew (macOS)
$ brew install dirmngr gpg curl gawkThe
sudocommand may be required depending on your system configuration.
After the dependencies are installed, add the Node.js plugin:
$ asdf plugin add nodejsThen, verify it:
$ asdf plugin list
elixir
erlang
nodejsThat means all the required plugins are ready. The next step is to install each runtime using asdf.
Runtime Installation in asdf#
In this section, we’ll install the three runtimes with their specified versions:
- Erlang - version 27.3
- Elixir - version 1.18.3-otp-27
- Node.js - latest version (at the time of writing: 23.10.0)
Before we begin, there’s one important thing to keep in mind: each Elixir version depends on a specific Erlang version. Since Elixir runs on the BEAM VM (which is provided by Erlang), we need to make sure the versions we choose are compatible.
To verify compatibility, we can refer to the official Elixir documentation, particularly the Compatibility and Deprecations ↗ section. Here’s a snippet from the compatibility table:
| Elixir version | Supported Erlang/OTP versions |
|---|---|
| 1.18 | 25 - 27 |
| 1.17 | 25 - 27 |
| 1.16 | 24 - 26 |
Since our target is Elixir 1.18, we’ll need Erlang version 25 through 27. Here, we’ll use version 27.3 to get the latest available version that is still fully compatible.
Searching Available Versions#
Before installing, we can check the list of available versions:
# Checking the Erlang version list
$ asdf list all erlang
...
27.3

# Checking the Elixir version list
$ asdf list all elixir
...
1.18.3-otp-27Make sure that Erlang 27.3 and Elixir 1.18.3-otp-27 are available.
For Node.js, we’ll simply install the latest version without explicitly specifying the version number.
Installing Erlang#
The first step is to install Erlang version 27.3:
$ asdf install erlang 27.3asdf will download the Erlang source code and compile it. This process may take a few minutes depending on the speed of our machine.
Once it’s done, we set this version as the global one:
$ asdf set --home erlang 27.3This command writes erlang 27.3 to the .tool-versions file in our home directory, so it will be used by default across our system.
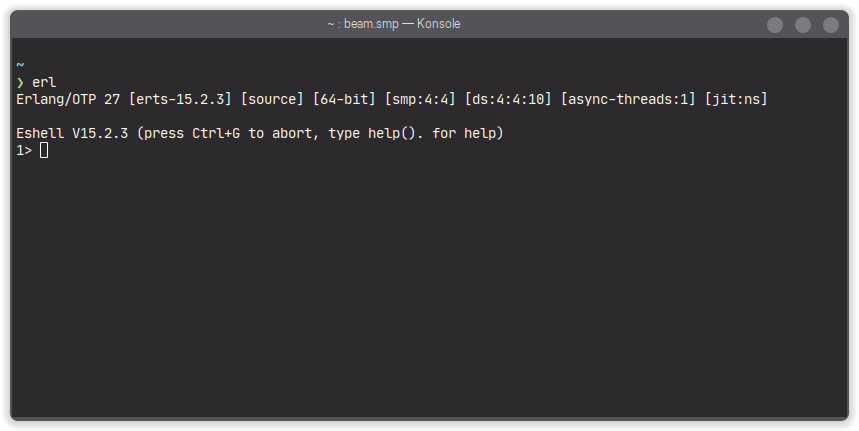
To verify the installation, we can enter the Erlang shell:
$ erlThe terminal will launch the Erlang shell and show us the version number.
Installing Elixir#
After setting up Erlang, we move on to install Elixir version 1.18.3-otp-27:
$ asdf install elixir 1.18.3-otp-27Unlike Erlang, Elixir is usually available as a precompiled binary, so the installation process will be much faster.
Once installed, set it as the global version:
$ asdf set --home elixir 1.18.3-otp-27This command adds elixir 1.18.3-otp-27 to the .tool-versions file, alongside the previous Erlang entry.
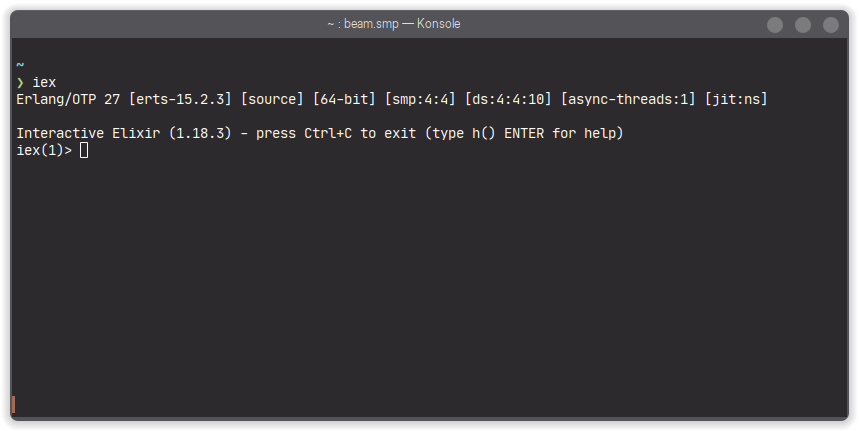
To make sure Elixir is active, we can run:
$ iexWe’ll enter the Elixir interactive shell and see the version displayed.
Installing Node.js#
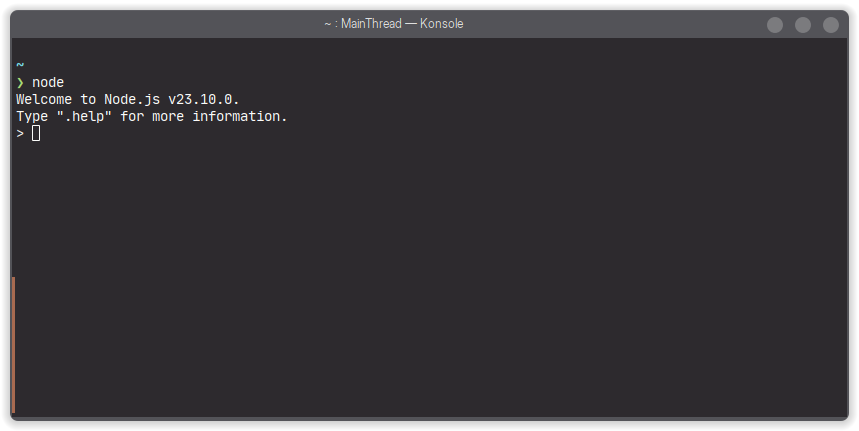
Lastly, we install Node.js. This time, we’ll go with the latest version available through asdf:
$ asdf install nodejs latestasdf will automatically search and install the most recent version (at the time of writing: 23.10.0).
Once the installation is complete, set this version as the default:
$ asdf set --home nodejs 23.10.0To confirm that everything is working properly, we can run:
$ nodeEnter the Node.js REPL and see the active version in use.
At this point, all the runtimes we need have been successfully installed and configured. In the next section, we’ll learn how to manage global and local runtime versions based on each project’s needs.
Setting the asdf Runtime Version#
After successfully installing Erlang, Elixir, and Node.js, it’s time to set the runtime versions we want to use.
asdf provides two ways to do this:
- Global version - applies system-wide.
- Local version - applies only within a specific project directory.
Both use the .tool-versions file as the configuration source, but located in different places.
Setting the Global Version#
The global version is the default version that will be used everywhere in the system, unless a local version is set to override it. This configuration is stored in the .tool-versions file inside our home directory (~).
In fact, when we ran the asdf set --home command earlier, we already set the global versions. But just to recap, here’s how it looks:
# Set global version to Erlang 27.3
$ asdf set --home erlang 27.3

# Set global version Elixir to 1.18.3-otp-27
$ asdf set --home elixir 1.18.3-otp-27

# Set global version Node.js to 23.10.0
$ asdf set --home nodejs 23.10.0With these settings, any command like erl, iex, or node will default to using the global version, no matter where we are in the system.
Setting the Local Version in a Project#
A local version applies only within a specific directory, typically a project folder.
Its configuration is stored in a .tool-versions file located at the project’s root.
As long as we’re inside that directory (or any of its subdirectories), asdf will use the local version and ignore the global one.
To try it out, let’s create a new Elixir project and set a different runtime version than the global one:
# Membuat proyek Elixir hello_world
$ mix new hello_world

# Masuk ke direktori proyek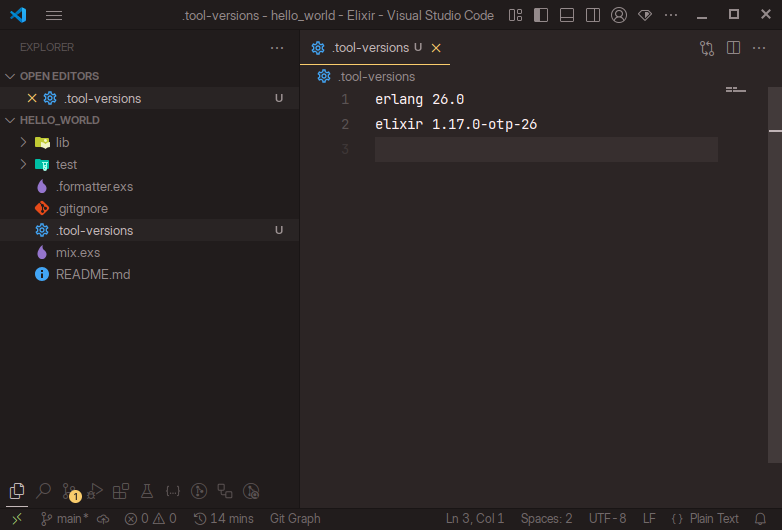
$ cd hello_worldInside this project, we’ll set Erlang to version 26.0 and Elixir to 1.17.0-otp-26:
# Set versi lokal Erlang ke 26.0
$ asdf set erlang 26.0

# Set versi lokal Elixir ke 1.17.0-otp-26
$ asdf set elixir 1.17.0-otp-26These commands will create a .tool-versions file in the project directory that looks like this:
Next, to install all the runtime versions listed in that file, we can simply run:
$ asdf installasdf will read the file, download the specified versions, and install them:
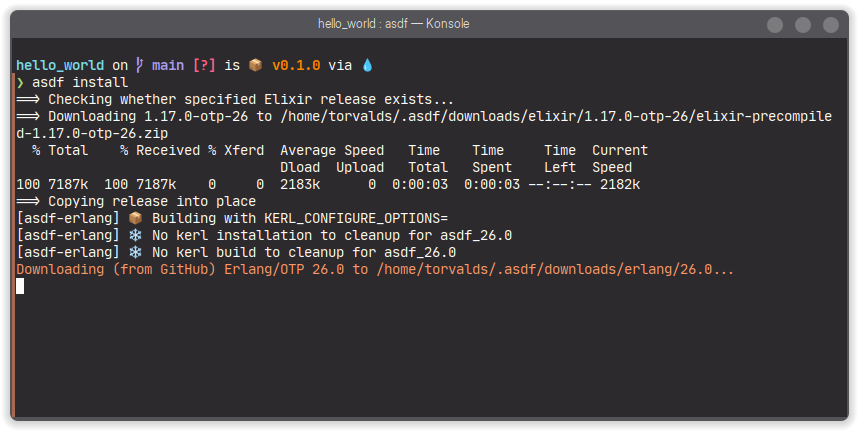
Once the installation is complete, we can verify that the local versions are active:
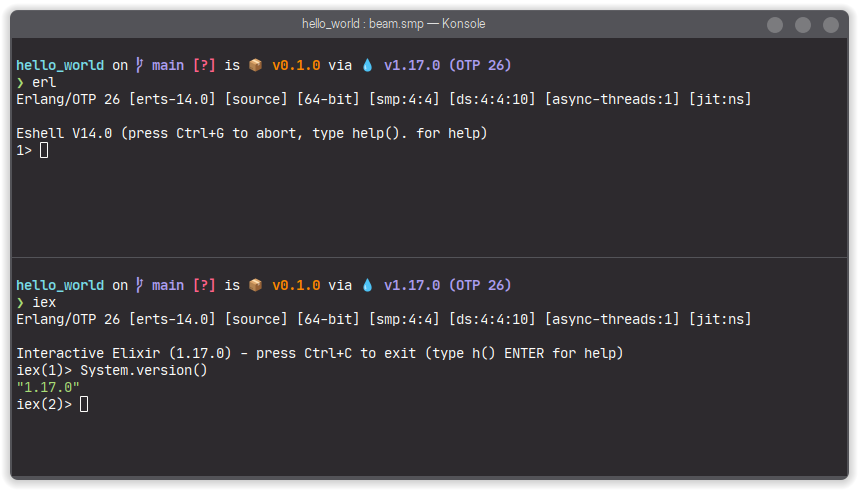
# Run the Erlang shell
$ erl
Erlang/OTP 26 [erts-14.0] ...

# Run the Interactive Elixir
$ iex
...
iex(1)> System.version()
"1.17.0"The Erlang version is shown right away when the shell starts. For Elixir, we can call System.version() inside iex to check the version.
So, the key difference between global and local versions lies in their scope:
- Global: used across the entire system.
- Local: used only in the directory where the
.tool-versionsfile is located.
With this understanding, we can flexibly manage multiple projects that each require different runtime versions.
ElixirLS: An Editor Extension for Elixir Development#
Official Elixir Language Server The Elixir core team has announced that they are working on an official Elixir Language Server, as shared in this blog post ↗. While we wait for its official release, we’ll use ElixirLS, a community-driven project maintained by elixir-lsp ↗.
ElixirLS is an editor extension that helps us write Elixir code more efficiently and productively. It consists of two main components:
- Language Server - enables editors like VS Code to understand our Elixir code structure. Features like code completion, go-to-definition, and inline documentation are available directly in the editor.
- Debug Adapter - allows us to perform step-through debugging: stepping through code line by line, inspecting variable values, and understanding how the program executes in real time.
With these components, ElixirLS provides a modern, interactive development experience.
Some of the features ElixirLS offers include:
- Debugger: Enables step-through debugging to explore code execution live.
- Automatic, Incremental Dialyzer Analysis: Runs static analysis using Dialyzer and provides feedback incrementally as we code.
- Automatic
@specSuggestions: Suggests type annotations based on Dialyzer’s inference. - Inline Reporting of Warnings and Errors: Displays compiler warnings and errors directly in the editor.
- Documentation Lookup on Hover: Shows function or module documentation when hovering the cursor over code.
- Go-to-Definition: Instantly navigates to function or module definitions.
- Code Completion: Suggests code completions while typing.
- Code Formatter: Automatically formats code following Elixir’s style guide.
- Find References: Lists all references to a given function or module.
- Quick Symbol Lookup in File: Allows searching for symbols like functions or variables in the current file.
- Quick Symbol Lookup in Workspace and Stdlib: Enables symbol search across the entire project and the Elixir/Erlang standard libraries.
With these features, ElixirLS becomes an essential tool that helps us write clean, understandable, and bug-resistant Elixir code.
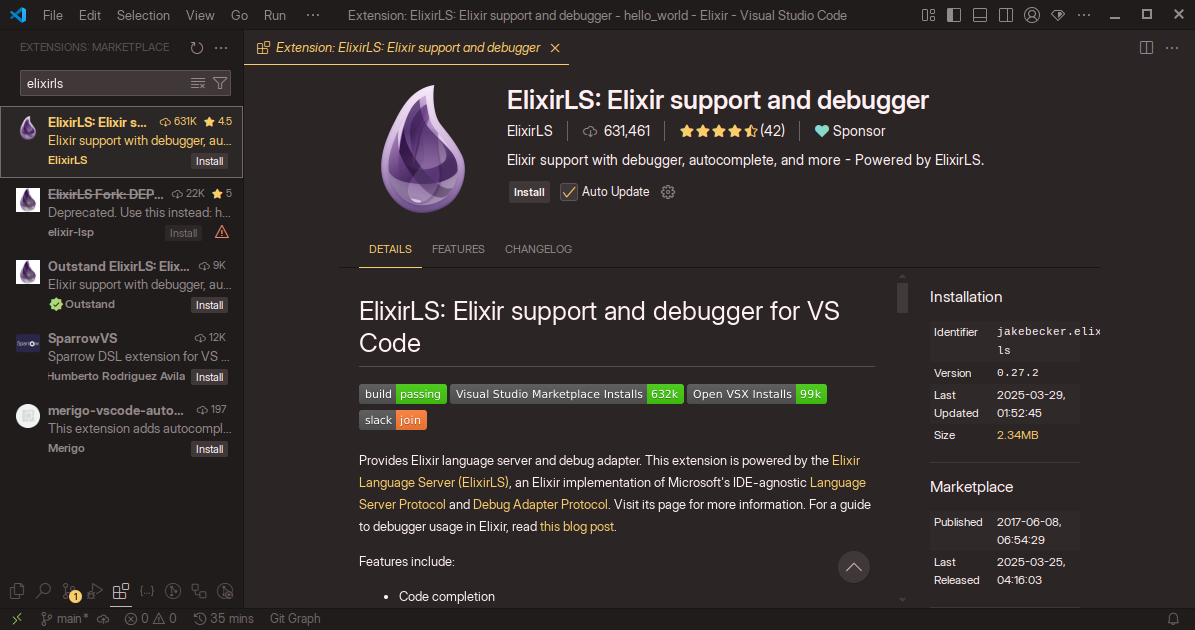
In this post, we’ll install ElixirLS in VS Code. For other editors, available extensions are listed under the IDE Plugins section in the README ↗ of the elixir-lsp repository.
Installing ElixirLS in VS Code:
- Open the Extensions panel by typing
Ctrl+Shift+Xor clicking the extensions icon in the Activity Bar. - Type
ElixirLSin the search bar. - Select the ElixirLS extension from the list and click Install.
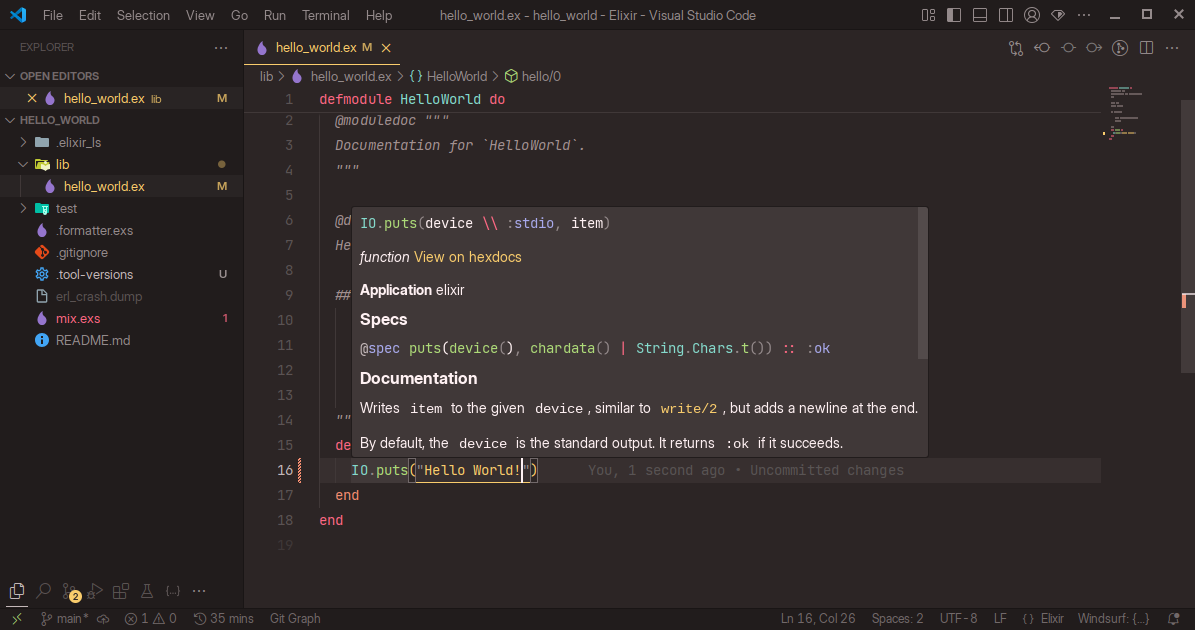
After installation, ElixirLS will build the PLT cache for Dialyzer on first use. This process can take around 10 minutes depending on our machine’s specs. Once it’s done, all ElixirLS features will be fully available.
With that, we’ve completed all the steps to set up our Elixir development environment, from installing asdf, configuring runtime versions, to integrating our editor with ElixirLS.
In the next lesson, we’ll begin learning Elixir from the ground up, starting with IEx, the interactive shell that will become our everyday companion as we write Elixir code.
References#
- asdf-vm. (2021, August 18). What is asdf? [Documentation]. https://asdf-vm.com/guide/introduction.html ↗
- asdf-vm. (2025, March 21). Getting Started [Documentation]. https://asdf-vm.com/guide/getting-started.html ↗
- asdf-vm. (2025, February 4). Erlang Plugin for asdf [GitHub README]. https://github.com/asdf-vm/asdf-erlang ↗
- asdf-vm. (2025, January 11). Elixir Plugin for asdf [GitHub README]. https://github.com/asdf-vm/asdf-elixir ↗
- Elixir. (2024, December 11). Compatibility and deprecations [Documentation]. https://hexdocs.pm/elixir/compatibility-and-deprecations.html#between-elixir-and-erlang-otp ↗
- elixir-lsp. (2025, March 24). ElixirLS - Elixir Language Server and Debug Adapter [GitHub README]. https://github.com/elixir-lsp/elixir-ls?tab=readme-ov-file#ide-plugins ↗